Discover the step-by-step process of painting a boat, from preparation to maintenance. Learn the best techniques and tips for a professional-looking finish.
Preparation for Painting a Boat
When it comes to painting a boat, proper preparation is key to achieving a long-lasting and professional-looking finish. In this section, we will discuss the important steps involved in preparing a boat for painting, including cleaning the boat surface, sanding the boat, and removing old paint.
Cleaning the Boat Surface
Before you can start painting, it’s crucial to ensure that the boat surface is clean and free from any dirt, grime, or contaminants. Cleaning the boat surface not only improves the adhesion of the paint but also helps in achieving a smooth and flawless finish.
To clean the boat surface, begin by rinsing it with fresh water to remove any loose debris. Then, use a marine boat soap or a mild detergent mixed with water to scrub the surface using a soft brush or sponge. Pay close attention to areas that are prone to dirt buildup, such as the hull, deck, and transom.
After scrubbing, thoroughly rinse the boat again to remove any soap residue. It’s important to ensure that no soapy water is left behind, as it can interfere with the paint’s adhesion. Finally, let the boat surface dry completely before moving on to the next step.

Sanding the Boat
Sanding the boat is an essential step in preparing the surface for painting. It helps in removing any roughness, imperfections, or old paint that may hinder the adhesion of the new paint.
Start by selecting the appropriate sandpaper grit based on the condition of the boat surface. For rough or damaged areas, use a lower grit sandpaper (around 80 to 120). For smoother areas or to remove old paint, a higher grit sandpaper (around 180 to 220) can be used.
Use a sanding block or a sanding machine to ensure even and consistent sanding. Sand in a circular or back-and-forth motion, following the contours of the boat. Be careful not to apply too much pressure, as it can damage the surface.
After sanding, wipe down the boat with a clean, damp cloth to remove any sanding dust. This will help in providing a clean surface for the paint to adhere to.
Removing Old Paint
If there is existing paint on the boat that needs to be removed, it’s important to properly strip it before applying a new coat. Removing old paint ensures better adhesion and prevents any issues that may arise from incompatible paint layers.
There are several methods to remove old paint from a boat surface. One common method is using a paint stripper or remover. Apply the paint stripper according to the manufacturer’s instructions, and let it sit for the recommended time. Then, use a scraper or putty knife to gently scrape off the softened paint.
Another method is sanding the boat surface using a lower grit sandpaper. This can help in removing the old paint layer by layer until the surface is clean and ready for painting. However, sanding should be done with caution to avoid damaging the underlying material.
Always ensure proper ventilation and use personal protective equipment, such as gloves and a mask, when working with paint strippers or sanding old paint.
By following these steps of cleaning the boat surface, sanding the boat, and removing old paint, you are setting a solid foundation for a successful boat painting project. Remember, proper preparation is essential for achieving a professional finish that will last for years to come.
Choosing the Right Paint for a Boat
Types of Boat Paint
When it comes to choosing the right paint for your boat, you have several options to consider. The type of paint you choose will depend on the specific needs of your boat and the marine environment it will be exposed to.
One popular type of boat paint is antifouling paint. This type of paint is designed to prevent marine organisms, such as barnacles and algae, from attaching to the hull of your boat. It contains biocides that inhibit the growth of these organisms and help to keep your boat’s bottom clean and free from fouling. Antifouling paint is typically used on boats that spend a lot of time in the water, such as sailboats and powerboats.
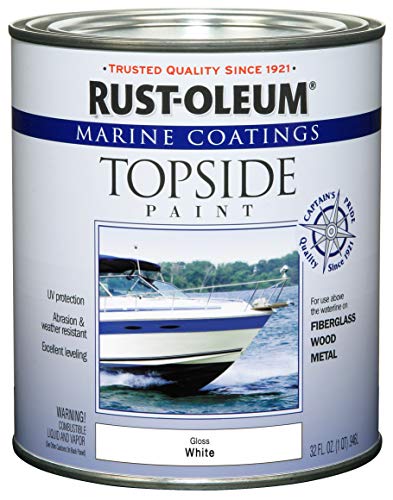
Another type of boat paint is topside paint. This paint is used on the upper parts of your boat, above the waterline. It provides a protective coating that helps to prevent damage from UV rays, saltwater, and other environmental factors. Topside paint is available in a range of colors and finishes, allowing you to customize the look of your boat.
There is also bottom paint, which is specifically designed for use on the bottom of your boat, below the waterline. It helps to protect the hull from osmotic blistering caused by prolonged exposure to water. Bottom paint is usually formulated with copper, which acts as a biocide to prevent the growth of marine organisms. It is important to choose a bottom paint that is suitable for the type of water you will be boating in, as different formulations are available for freshwater and saltwater environments.
Considerations for Marine Environments
When selecting paint for your boat, it is crucial to consider the unique challenges posed by the marine environment. Boats are constantly exposed to harsh conditions such as saltwater, UV rays, and fluctuating temperatures, which can cause paint to deteriorate quickly if not properly protected.

One important consideration is the durability of the paint. Marine environments can be unforgiving, so you need a paint that can withstand the elements and provide long-lasting protection. Look for paints that are specifically formulated for marine use and have a proven track record of durability.
Another consideration is the compatibility of the paint with the materials used in your boat’s construction. Different types of boat materials, such as fiberglass, aluminum, or wood, require different types of paint. Make sure to choose a paint that is compatible with the material of your boat to ensure proper adhesion and longevity.
Additionally, it is important to consider the environmental impact of the paint you choose. Many boat paints contain toxic substances that can be harmful to marine life. Look for paints that are labeled as environmentally friendly or low in volatile organic compounds (VOCs) to minimize the impact on the ecosystem.
Applying Primer to a Boat
Importance of Primer
Primer is a crucial step in painting a boat as it prepares the surface for the application of paint. It acts as a bonding agent between the boat’s surface and the paint, ensuring better adhesion and longevity of the paint job. Without primer, the paint may not adhere properly to the boat’s surface, leading to peeling, cracking, and premature damage. Primer also helps to seal the surface, preventing moisture from seeping into the boat and causing corrosion or rot. By providing a smooth base, primer enhances the final appearance of the boat’s paint job, resulting in a professional and polished finish.
Types of Boat Primers
There are various types of primers available for boats, each designed for specific purposes. It is essential to choose the right primer for your boat to achieve the best results.

- Epoxy Primers: Epoxy primers are known for their excellent adhesion to a wide range of surfaces, including fiberglass, aluminum, and wood. They provide superior protection against moisture and are highly resistant to chemicals and abrasion. Epoxy primers are often used as a base coat for high-performance boat paints.
- Polyurethane Primers: Polyurethane primers are versatile and can be used on different types of boat surfaces. They offer good adhesion, flexibility, and durability. Polyurethane primers are particularly suitable for use on fiberglass boats and can provide excellent protection against water intrusion.
- Etching Primers: Etching primers are specifically formulated to adhere to bare metals like aluminum and steel. They contain acid, which helps to etch the surface, creating a strong bond between the primer and the metal. Etching primers are ideal for boats made of aluminum or steel and provide excellent corrosion resistance.
- Wood Primers: Wood primers are designed for use on wooden boats and provide protection against rot, mold, and other wood-related issues. They penetrate the wood fibers, sealing them and preventing moisture from entering. Wood primers often contain fungicides to inhibit the growth of mold and mildew.
Proper Application Techniques
To ensure the primer adheres properly and provides optimal protection, it is essential to follow proper application techniques. Here are some tips to keep in mind:
- Clean and Prepare the Surface: Before applying primer, make sure the boat’s surface is clean, dry, and free from dirt, grease, and loose paint. Use a boat cleaner or mild detergent to remove any contaminants. Sand the surface lightly to create a rough texture, which helps the primer bond better.
- Choose the Right Tools: Select appropriate tools for applying primer, such as brushes, rollers, or spray guns, depending on the type of primer and the size of the boat. Brushes are suitable for smaller areas, while rollers are efficient for larger surfaces. Spray guns provide a smooth and even application but require proper ventilation and protective gear.
- Apply Thin and Even Coats: Apply the primer in thin, even coats to avoid drips and runs. Multiple thin coats are preferable to one thick coat. Follow the manufacturer’s instructions regarding drying time between coats.
- Sand Between Coats: After each coat of primer has dried, lightly sand the surface with fine-grit sandpaper to smooth out any imperfections and provide a better surface for the next coat. Wipe away the sanding residue before applying the next coat.
- Follow Drying and Curing Times: Allow the primer to dry and cure fully before applying the paint. Drying and curing times may vary depending on the type of primer used, temperature, and humidity levels. Follow the manufacturer’s recommendations for the specific primer you have chosen.
By understanding the importance of primer, selecting the appropriate type for your boat, and following proper application techniques, you can ensure a successful and long-lasting paint job. Taking the time to properly prime your boat will result in a beautiful finish and enhanced protection against the elements.
[Table]
| Primer Type | Suitable Surfaces | Benefits |
|——————|————————–|—————————————|
| Epoxy Primers | Fiberglass, Aluminum, Wood | Excellent adhesion, chemical resistance |
| Polyurethane Primers | Various Surfaces | Good adhesion, flexibility, durability |
| Etching Primers | Aluminum, Steel | Strong bond, corrosion resistance |
| Wood Primers | Wooden Surfaces | Protection against rot and mold |
[/Table]
Painting Techniques for a Boat
Brush Painting
Brush painting is a popular and traditional method of applying paint to a boat. It offers a high level of control and precision, allowing you to easily navigate around curves, corners, and intricate details. To brush paint a boat, you will need a high-quality marine-grade paintbrush and a steady hand.
Before you begin, it’s important to prepare the boat surface properly. Clean the surface thoroughly to remove any dirt, grime, or old paint. Sand the boat lightly to create a smooth surface for the paint to adhere to. Once the surface is clean and smooth, you can start applying the paint.
When brush painting, use long, even strokes in the direction of the boat’s length. This will help to minimize brush marks and ensure a smooth finish. Work in small sections, starting from the top of the boat and working your way down. Apply multiple thin coats rather than one thick coat to avoid drips and runs.
Rolling and Tipping
Rolling and tipping is another technique commonly used for painting boats. It involves using a paint roller to apply the paint and then smoothing out the surface with a brush, also known as “tipping.” This method is efficient and can provide a professional-looking finish.
To roll and tip a boat, you will need a high-quality marine-grade paint roller, a paint tray, and a paintbrush. Start by pouring the paint into the tray and loading the roller evenly. Apply the paint to the boat surface using long, even strokes. Once the paint is applied, use a brush to lightly smooth out any roller marks or imperfections.
Rolling and tipping is ideal for larger areas of the boat, such as the hull or deck. It allows for quick coverage and a smooth finish. Just like with brush painting, it’s important to prepare the boat surface properly before starting. Clean and sand the surface to ensure optimal adhesion of the paint.
Spray Painting
Spray painting is a popular choice for boat owners who want to achieve a flawless, professional finish. It offers an even application and can cover large areas quickly. However, spray painting requires careful preparation and the use of proper protective equipment.
Before spray painting, make sure to cover any areas that you don’t want to be painted, such as windows, fixtures, or hardware. Use masking tape and plastic sheeting to protect these areas. It’s also important to wear a respirator mask, goggles, and gloves to protect yourself from the paint fumes and overspray.
When spray painting, maintain a consistent distance between the spray gun and the boat surface. Move the spray gun in a smooth, sweeping motion to ensure even coverage. Apply multiple thin coats, allowing each coat to dry before applying the next. This will help to prevent drips and runs.
Spray painting is best suited for larger areas of the boat, such as the hull or deck. It can be more challenging to achieve a smooth finish on smaller, detailed areas. If you’re new to spray painting, it’s recommended to practice on a small, inconspicuous area first to get a feel for the technique.
Maintaining a Painted Boat
Taking care of your painted boat is essential to ensure its longevity and keep it looking its best. Regular maintenance can help protect against damage caused by exposure to the elements and keep the paint job in pristine condition. In this section, we will discuss three important aspects of maintaining a painted boat: cleaning and washing, waxing and polishing, and touching up damaged areas.
Cleaning and Washing
Properly cleaning and washing your boat is the first step in maintaining its painted surface. Over time, dirt, salt, algae, and other debris can accumulate on the boat’s exterior, dulling the paint and potentially causing damage. Here are some tips for effective cleaning and washing:
- Choose the Right Cleaning Products: Use mild, non-abrasive boat cleaners specifically designed for marine applications. Avoid harsh chemicals that can strip away the protective layers of paint or harm the environment.
- Start with a Rinse: Before applying any cleaning products, give your boat a thorough rinse with fresh water. This will help remove loose debris and make the cleaning process easier.
- Scrub Gently: Use a soft-bristle brush or sponge to scrub the boat’s surface. Work in small sections and apply gentle pressure to avoid scratching or damaging the paint. Pay extra attention to areas with stubborn stains or grime.
- Rinse Thoroughly: After scrubbing, rinse the boat again with fresh water to remove any remaining cleaning products and residue. Make sure to rinse off all areas, including hard-to-reach spots like crevices and corners.
- Dry Completely: To prevent water spots and mineral deposits, dry the boat thoroughly using a clean, lint-free cloth or chamois. Pay attention to areas where water tends to accumulate, such as the bilge and deck seams.
By following these cleaning and washing practices regularly, you can help maintain the beauty and integrity of your boat’s paint job.
Waxing and Polishing
Waxing and polishing are crucial steps in protecting your boat’s paint and keeping it looking glossy and smooth. These processes create a barrier against UV rays, saltwater, and other environmental factors that can cause fading and deterioration. Here are some key points to consider when waxing and polishing your boat:
- Choose the Right Products: Select marine-grade wax and polish specifically formulated for use on boats. These products are designed to withstand the unique challenges of the marine environment.
- Prepare the Surface: Before applying wax or polish, ensure that the boat’s surface is clean and free of dirt or grime. This will help the products adhere properly and provide optimal protection.
- Apply in Small Sections: Work on small sections at a time, applying the wax or polish using a clean, soft cloth or applicator pad. Follow the product instructions for the recommended application technique.
- Buff to a Shine: After applying the wax or polish, use a separate clean cloth to buff the surface to a high shine. This will help remove any excess product and reveal the boat’s lustrous finish.
- Repeat as Needed: Depending on the level of exposure and use, you may need to wax and polish your boat several times throughout the boating season. Regular maintenance will ensure optimal protection and appearance.
Remember, waxing and polishing your boat not only enhances its visual appeal but also provides a protective layer that can extend the lifespan of the paint job.
Touching up Damaged Areas
Despite your best efforts, accidents or wear and tear can sometimes result in small scratches, chips, or other damage to your boat’s paint. It’s important to address these issues promptly to prevent further deterioration. Here are some steps to effectively touch up damaged areas:
- Assess the Damage: Carefully examine the affected area to determine the extent of the damage. If the damage is minor, you may be able to fix it yourself. However, for more significant damage, it’s advisable to consult a professional.
- Clean and Prep: Before touching up the damaged area, clean it thoroughly and remove any loose paint or debris. Use a mild detergent and water or a specialized boat cleaner to ensure a clean surface.
- Match the Paint: Identify the exact color and type of paint used on your boat. This will ensure a seamless and accurate touch-up. Consult your boat manufacturer or a marine supply store to obtain the correct paint.
- Apply the Paint: Using a small brush or applicator, carefully apply the touch-up paint to the damaged area. Take your time and apply thin, even coats to achieve the best results. Allow each coat to dry before applying the next.
- Blend and Finish: Once the touch-up paint has dried, use a fine-grit sandpaper to gently blend the edges of the repair with the surrounding paint. This will help create a smooth and seamless finish. Finally, apply a clear coat or wax to protect the repaired area.
By addressing damaged areas promptly and following these touch-up techniques, you can maintain the overall appearance and integrity of your boat’s paint.
In conclusion, maintaining a painted boat involves regular cleaning and washing, waxing and polishing, and addressing any damaged areas. By following these maintenance practices, you can ensure that your boat’s paint job remains vibrant, protected, and visually appealing for years to come. Remember to consult your boat manufacturer or a professional if you have any specific concerns or questions regarding your boat’s paint maintenance.